

July 17-19, 2024, NECC (Shanghai), China
DIY Baby Closet Dividers
2016-05-10I’m going to give fair WARNING: over the next few months there are going to be lots of baby projects & posts. When blogging, I try to stick to what is going on in real life & not just create projects to have something to blog about, you know. So these days when I have the energy my projects have to do with baby girl (like sewing her this sleep sack). I hope you don’t mind :o) And today will focus on little one too, as I show you how to make these baby closet dividers.

In an effort to organize all the stitched love, and make my life easier after she has spit up on yet another outfit, I created these baby closet dividers so I know what size is where. They were SO simple & help me to feel at least a little organized (because surprisingly enough with only 9 weeks to go, I haven’t really started the nursery).

Okay, so you’ll need cardstock (or a cereal box), scissors, patterned paper, washi tape, glue stick or spray adhesive, and two circles to trace (a small & big).

After opening up the cereal box I traced the outside of the Scotch tape as many times as it could fit. In the center of each circle I traced the bottom of the Keurig cup.
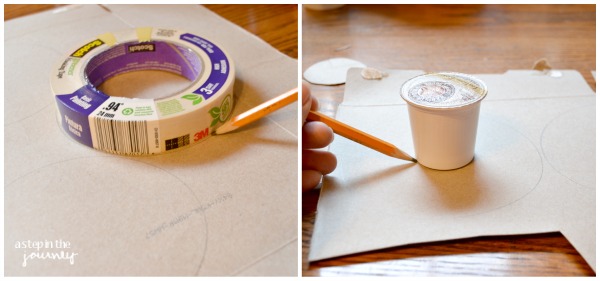
Next, cut the dividers out. Don’t worry about getting to the middle….you can cut straight up from the edge of your big circle and then around the smaller circle. You’ll need that cut through to loop around the clothes rack.
Now you’ll need to trace each divider onto the patterned paper you’ll be using. Make sure to keep the cardstock circle and it’s matching patterned paper circle together. Since these are hand cut there will be some variation, so keeping each actual divider with it’s corresponding paper will make everything match up better.

I attached the scrapbook paper to the cardboard divider using spray adhesive, but you could also use a glue stick.

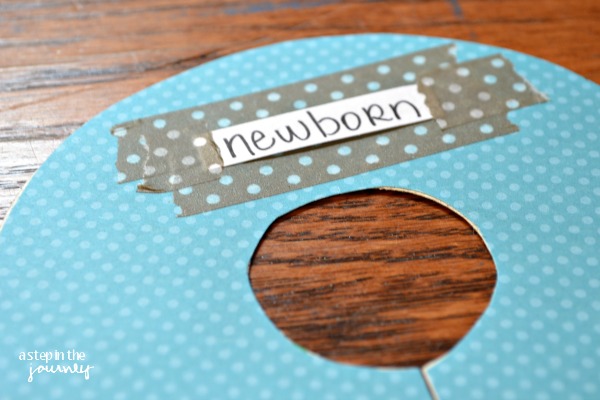
The final step was adding the sizes to the dividers. To do this I decided to use washi tape, copy paper, and my own handwriting.
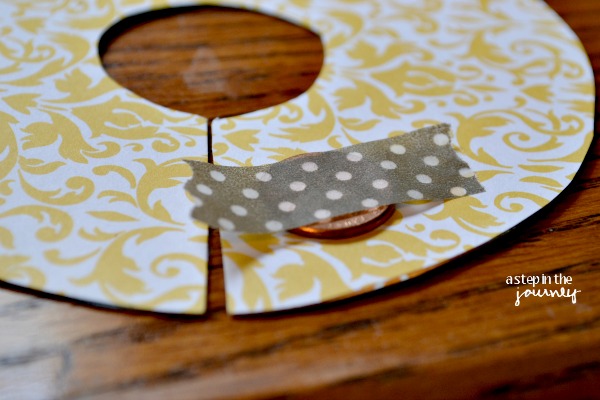
Update: my dividers weren’t hanging exactly the way I wanted, so I added a penny to the bottom to weight them down and keep the label side up!
I am so happy to begin getting baby girl’s nursery ready for her arrival!! I have BIG ideas for this room & know once we get going this weekend, it will all happen so quickly!
Do you want a fabric sneak peak? Check out my facebook page for a preview!! So so you have any other nursery organization tips for me?? They will be much appreciated!


 沪公网安备 31010102004693号